Share Post:
Installing a dashcam is a great way to enhance your vehicle’s safety and document road events. While you can simply use the plug-and-play method with your car’s 12V socket, hardwiring your dashcam provides significant advantages.
It offers a cleaner, more professional look, enables parking mode for continuous monitoring, and frees up your 12V socket for other uses.
Table of Contents
ToggleStep 1: Preparation
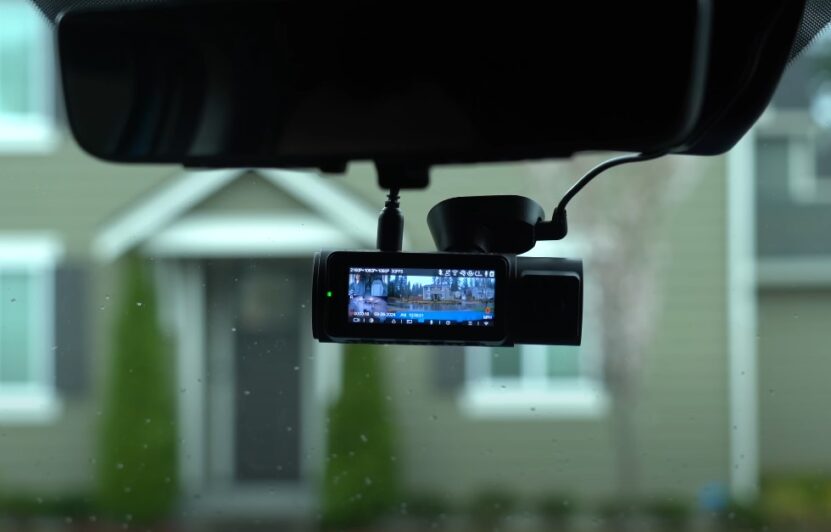
Start by assembling your tools and reviewing your car’s manual to locate the fuse box and understand its functions. Ensure your dashcam is set up with an SD card to begin recording immediately after installation.
Carefully inspect the hardwire kit, paying attention to the labeled wires: red for ACC (accessory), yellow for constant power, and black for grounding. Planning the wire route is essential to ensure the cables remain hidden along the headliner and vehicle trims.
@trevorlong How to Install a Dashcam – it’s far easier than you think, easy to hide those cables – what do you think? Here I am installing a @Uniden ♬ original sound – Trevor Long
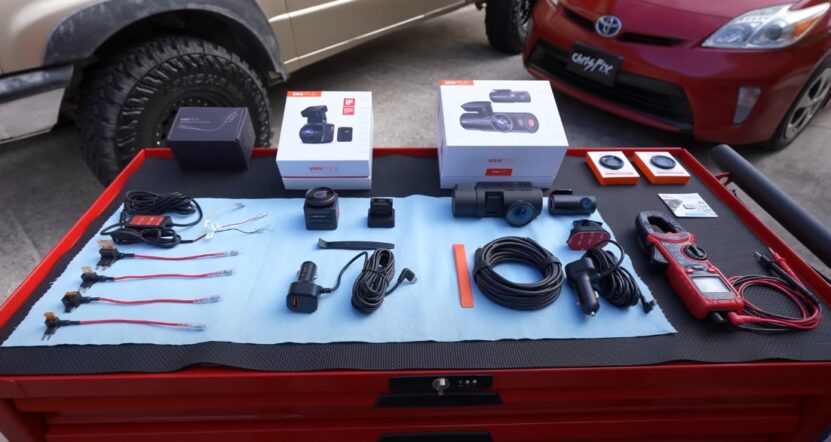
Before you start, gather all the necessary tools and materials for a seamless installation. Here’s what you’ll need:
- Dashcam and hardwire kit: Includes all the essential cables for power.
- Fuse tap cables: Helps integrate the dashcam into the car’s fuse box.
- Fuse puller or pliers: For safely removing and inserting fuses.
- Electrical tape, zip ties, and cable clips: To secure and organize the wiring.
- Multi-meter (optional): Useful for testing fuse connections.
- Vehicle owner’s manual: A critical resource for locating and understanding your car’s fuse box.
Step 2: Identify the Fuse Box
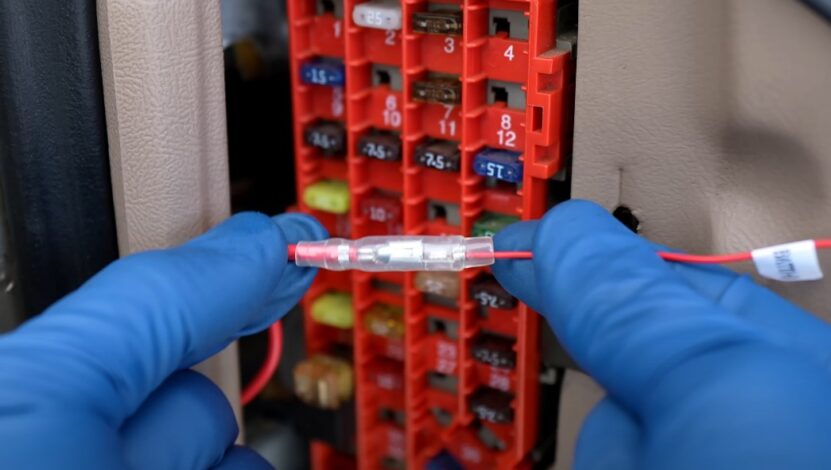
The first step in the installation process is identifying the correct location of your vehicle’s fuse box. This is where you will connect the dashcam’s power supply. The fuse box acts as the central hub for your car’s electrical system, including GPS, containing fuses that protect various components, such as the radio, lights, and ignition, from power surges or faults.
Common Locations of the Fuse Box
Most vehicles have multiple fuse boxes, but the one you need for this installation is typically located in one of the following places:
- Under the steering wheel: This is the most common location and often requires you to crouch or use a flashlight to see it clearly.
- Inside the glove box: Some vehicles have a secondary fuse box hidden behind or under the glove box, accessible by removing a panel.
- Under the hood: For larger vehicles or specific models, the fuse box may be housed in the engine compartment.
Accessing the Fuse Box
Once you’ve located the fuse box, carefully remove its cover. The cover typically snaps off or may require gentle prying using a plastic pry tool.
Underneath the cover, you’ll often find a diagram that details the function of each fuse, which will be essential for the next steps. Keep the cover in a safe place, as you’ll need to reattach it after completing the installation to protect the fuses from dirt and damage.
Step 3: Determine Fuse Types
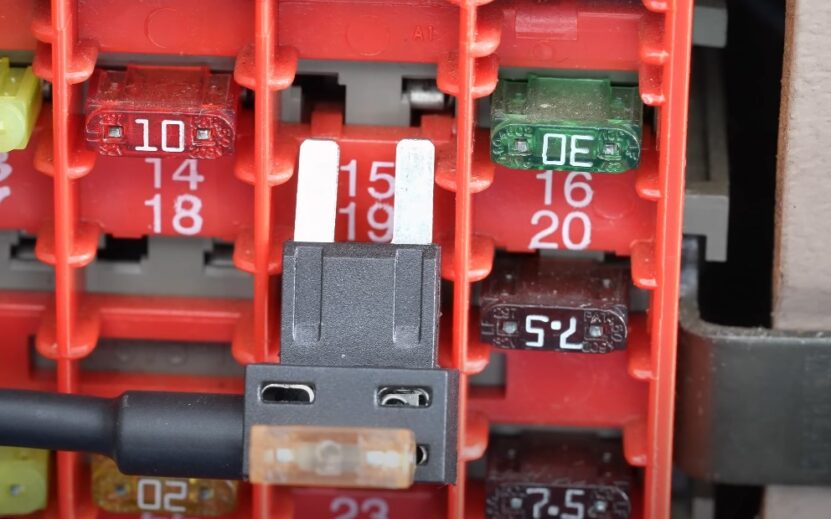
Identifying the correct fuse types is a critical step in ensuring your dashcam operates as intended, whether during active driving or in parking mode. The two primary fuse types you’ll need to identify are:
ACC Fuse
ACC fuse powers on only when the vehicle ignition is turned on. Common examples include fuses connected to the radio, cigarette lighter, or other accessories. The ACC fuse allows the dashcam to operate only while the car is running, conserving battery life.
Constant Fuse
Constant fuse remains powered even when the ignition is off. For instance, the fuse linked to brake lights or interior lighting typically provides constant power. The connection is essential for enabling features like parking mode, where the dashcam continues recording during inactivity.
To locate and identify these fuses, use a circuit tester or refer to the fuse diagram in your car manual. The fuse diagram provides detailed information on the function and amperage of each fuse in your vehicle.
For most dashcams, it’s recommended to select fuses with an amperage between 7.5A and 15A to ensure compatibility without overloading the system.
Double-check your chosen fuses to prevent electrical malfunctions. Incorrectly connected fuses can lead to blown circuits or disrupt the dashcam’s operation. For additional inspiration on how brake light systems function, consider checking Denali Electronics.
Step 4: Insert Fuse Tap Cables
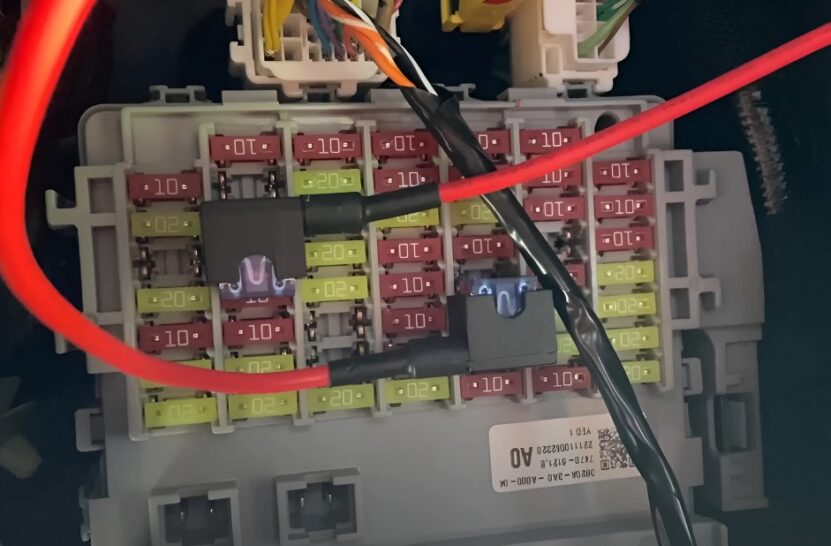
Installing fuse tap cables is a critical step to ensure your dashcam draws power from the correct sources without overloading the vehicle’s electrical system. Follow these steps carefully to avoid any mishaps:
Remove the Identified Fuses
Use a fuse puller or pliers to gently remove the fuses you’ve identified for the ACC (accessory) and constant power connections. These fuses are usually responsible for powering systems like the radio (ACC) and brake lights (constant). Handle the fuses with care to avoid damaging them or the fuse box.
Insert Fuses into the Add-a-Fuse Slot
Take the fuses you just removed and insert them into the appropriate slots on the add-a-fuse (fuse tap) cable. This step is essential as it maintains the original circuit’s function while creating a new connection for the dashcam. Ensure the fuses are fully seated and properly aligned within the fuse tap.
Connect the Fuse Tap Cables
Once the fuses are in place, connect the fuse tap cables to their corresponding fuse slots in the fuse box:
- Red wire: Attach this to the ACC fuse slot. This wire ensures the dashcam powers on only when the vehicle ignition is turned on.
- Yellow wire: Attach this to the constant power fuse slot. This wire keeps the dashcam operational even when the car is off, enabling features like parking mode.
Step 5: Ground the Wiring
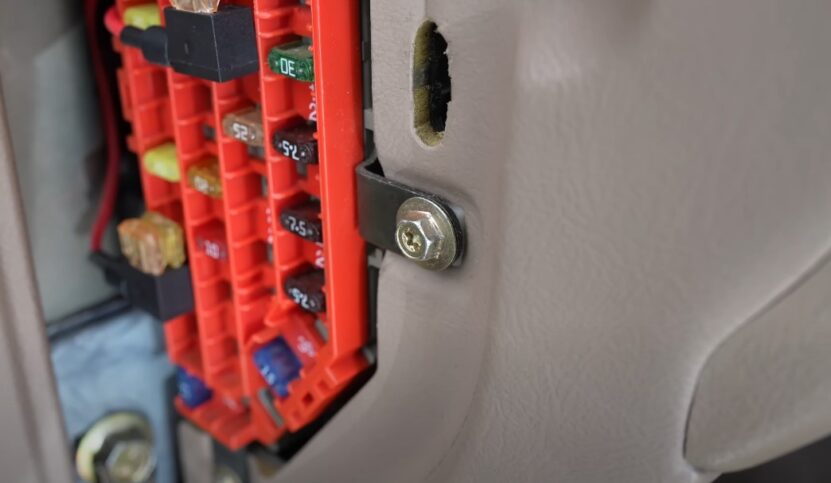
Grounding is a critical step in the hardwiring process, as it ensures the electrical circuit is complete and stable, allowing your dashcam to function reliably. Start by locating a secure grounding point near your vehicle’s fuse box.
These points are typically bolts or screws that connect directly to the car’s metal frame, providing a solid connection to the vehicle’s ground.
The grounding point should be free of paint, rust, or debris, as these can interfere with the electrical connection. If necessary, use sandpaper or a wire brush to clean the area and expose bare metal.
Most hardwire kits come with a ring terminal pre-installed on the black wire. Use a wrench or screwdriver to unscrew the bolt or screw at the grounding point, slide the ring terminal onto the bolt, and then re-secure it tightly.
Ensure the connection is firm, as a loose or weak grounding point can result in power fluctuations, causing the dashcam to malfunction or fail to turn on. To confirm a proper ground connection, use a multi-meter if available.
Set the multimeter to measure continuity and touch one probe to the grounding point and the other to a known ground (such as the car frame). If the multi-meter beeps or shows a continuous reading, the connection is solid.
Step 6: Connect the Dashcam
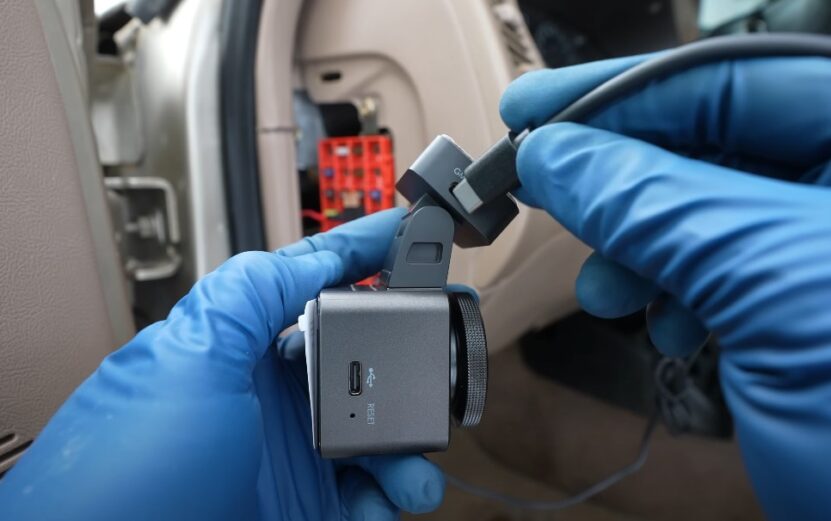
This step involves connecting the dashcam to the vehicle’s power system and ensuring the wiring is neatly routed for both functionality and aesthetics. Proper wire management ensures the installation is safe and does not interfere with the vehicle’s operations. Follow these instructions for a clean and professional setup: Run the Power Cable:
- Start by running the power cable from the dashcam to the fuse box.
- Use the headliner as a path to hide the wires. Carefully tuck the cable under the headliner, ensuring it is snug but not overly tight.
- Continue routing the cable down the A-pillar and towards the fuse box. Use caution to avoid interfering with any airbags located in the A-pillar.
Tidy the Wiring Using Tools:
- Use a pry tool to lift trims and tuck wires neatly behind them.
- Secure the cable with zip ties where necessary, especially around the fuse box area, to prevent any movement during driving.
- Avoid placing wires near moving parts like pedals, steering components, or seat mechanisms.
Connect the Hardwire Kit to the Dashcam:
- Attach the power cable from the hardwire kit to the dashcam’s power input.
- Use the adhesive mounts provided with the hardwire kit to secure the module in place.
- Choose a spot near the fuse box for easy access while keeping it discreet.
- Ensure all connections are tight to avoid disconnection during use.
Test for Proper Connection:
- Verify that the power cable is firmly connected to the dashcam and the hardwire kit.
- Ensure no cables are exposed or hanging loosely.
Step 7: Test the Installation
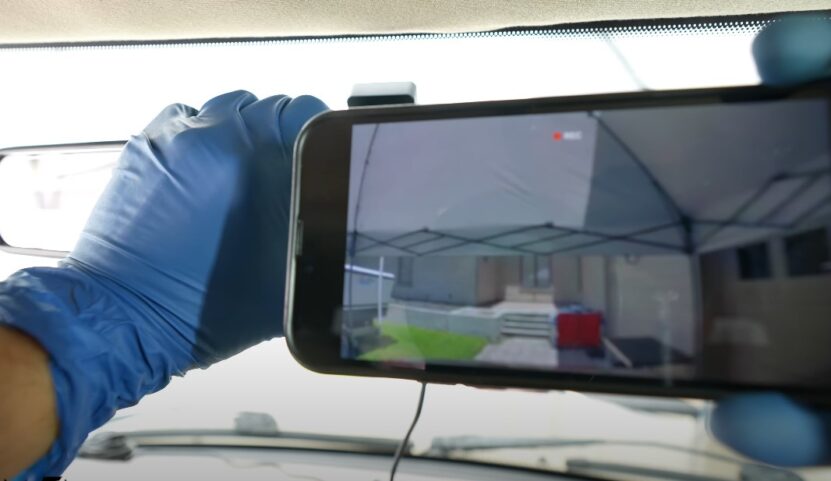
Testing the installation is crucial to ensure your dashcam is functioning correctly and ready for use. Follow these steps to verify the system’s performance:
- Start the Car: Turn on the ignition and observe if the dashcam powers on automatically.
- Check Parking Mode: Turn off the ignition and check if the dashcam enters parking mode.
Verify Functionality
Use the dashcam’s screen or a connected app to ensure the device is functioning properly. Look for any error indicators, such as low voltage warnings or connection errors, that may need troubleshooting. Ensure the dashcam is recording and saving footage correctly. You can view test recordings to confirm.
Adjust the Camera Angle
Position the dashcam to capture the optimal road view, ensuring the lens is unobstructed by the rearview mirror or other objects. Test different angles to include the hood of your car for reference and maximize the field of view.
Step 8: Tidy Up and Secure Wiring
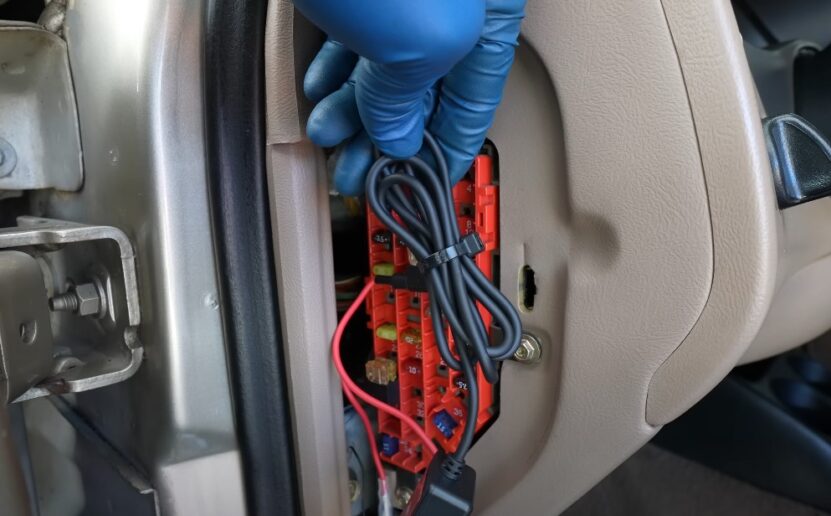
Once the dashcam installation is functional, it’s time to clean up and secure the wiring for a professional and safe finish. This step not only improves aesthetics but also ensures that the wires don’t interfere with your vehicle’s operation.
Use zip ties to bundle up any extra length of wiring neatly. Place these bundles near the fuse box or other inconspicuous areas. Ensure they are tight enough to hold but not so tight that they could damage the wires. Use adhesive cable clips to route wires along the edges of the car’s interior panels.
This prevents them from dangling or becoming loose over time. Secure them firmly to ensure longevity. Carefully tuck wires under the headliner, side panels, or door trims. Use a pry tool to gently lift the trims, making sure not to damage any clips or panels.
Double-check that no wires are obstructing moving parts, such as seat adjustments or airbag deployment areas. This is critical for maintaining vehicle safety standards.
The Bottom Line
Hardwiring a dashcam offers a sleek, functional, and long-term solution for drivers. By following these steps, you’ll ensure a secure installation that enhances your dashcam’s capabilities, including parking mode and cleaner aesthetics. If at any step you feel uncertain, seek professional assistance to avoid potential issues.
Related Posts:


